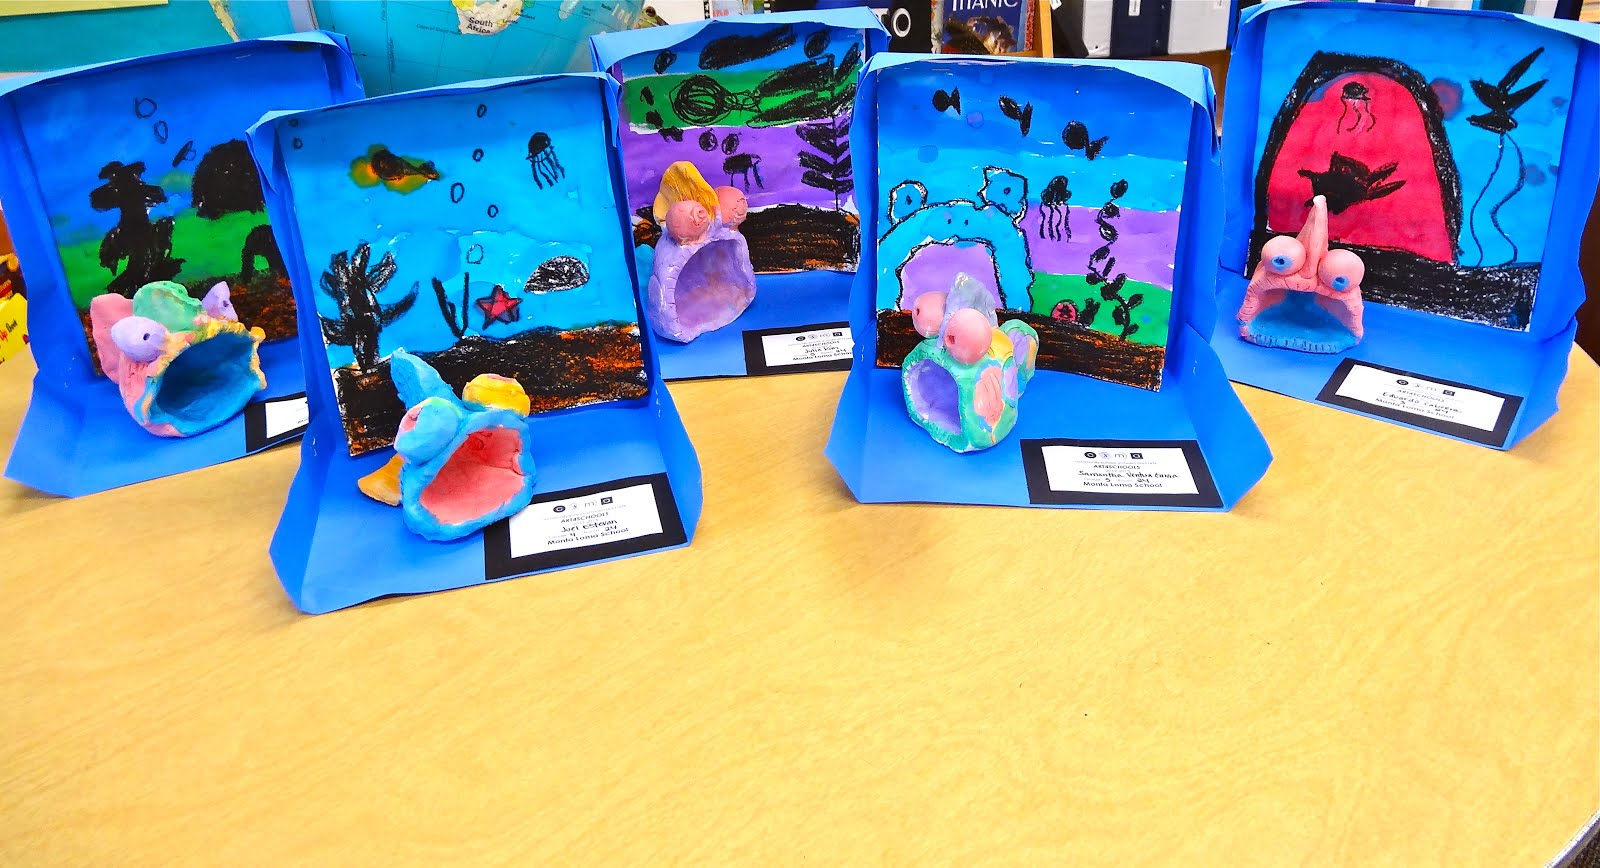
So it is my first year teaching ceramics, and I saw a bunch of ideas for animals with a pinch pot as the body. Super cute idea, not too hard... (for me to instruct at least). I did this with all 4 of my 3rd grade classes (roughly 100 kids + 1 Special Needs class - some pieces not pictured).
Every student got a cube of clay, standard procedure. We used our palms to pound down the corners to make a ball. I then demonstrated how to push your thumb into the clay ball, making sure not to press too far down. I then showed how to pinch the ball starting at the bottom working up to the top, rotating the ball as they go around it, with their index and thumb fingers.
We then put this pot so that the opening (mouth) was facing us. I passed around extra clay to everyone to pinch, and add-on fins, big eyeballs, a tail fin and whatever else they wanted. Some kids made beautiful monster-like fish! Love it.
I made sure to drill into their brains how important it is to "score and slip" each piece they are going to attach, as they will fall off when drying or in the kiln otherwise.
We used some texture tools to make gills, patterns, textures on the body of the fish. This part was completely up to them. After firing (for my first time how exciting :) ) , we used liquid watercolor to "glaze" our sculptures. I liked using liquid water color as it absorbs into the clay immediately, and is relatively not messy. I will dip them all in floor wax before the end of the year.
On the same day, we painted the environment of where our fish might live, using the same watercolors and black pastel. I got this idea from a colleague of mine, a phenomenal art teacher, also at Monta Loma. Stapling the "housings" took awhile, but it is very much worth it, especially at open house at the end of the year! Easy transport.